HostNine is one of the affordable hosting providers today. Unlike others, HostNine can load a page faster consistently. Plus, they have a simple and user-friendly homepage, that’s why it is easier to use and understand. What’s more interesting is that they offer 45-days money back guarantee, free site migration and more. There are indeed a lot of advantages and perks in using this hosting provider.
Let’s start now! Here are the steps on how to add a domain to HostNine and WordPress Installation for enterprise hosting plan. So, Before adding a domain in your H9 account, first, update your domain nameservers using the provided H9 nameservers.
Default HostNine nameservers:
ns1.speedydns.net, ns2.speedydns.net, ns3.speedydns.net
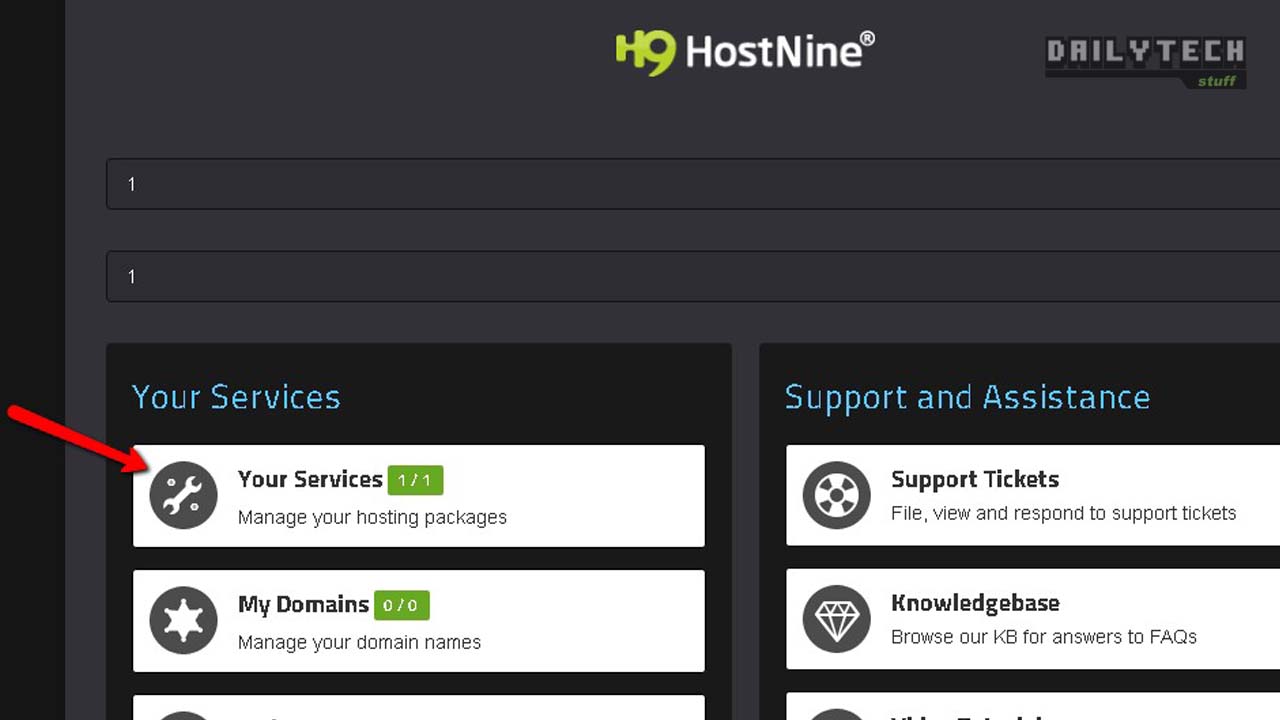 After logging in to your account, your HostNine dashboard will look like this. In “Your Services” section, you will find your main domain.
On your account, “domain.com” will hold all the domain you will add on your H9 account. Just click the “VIEW DETAILS” button on the right side, and it will redirect you on your main domain details where you can log in on the control panel.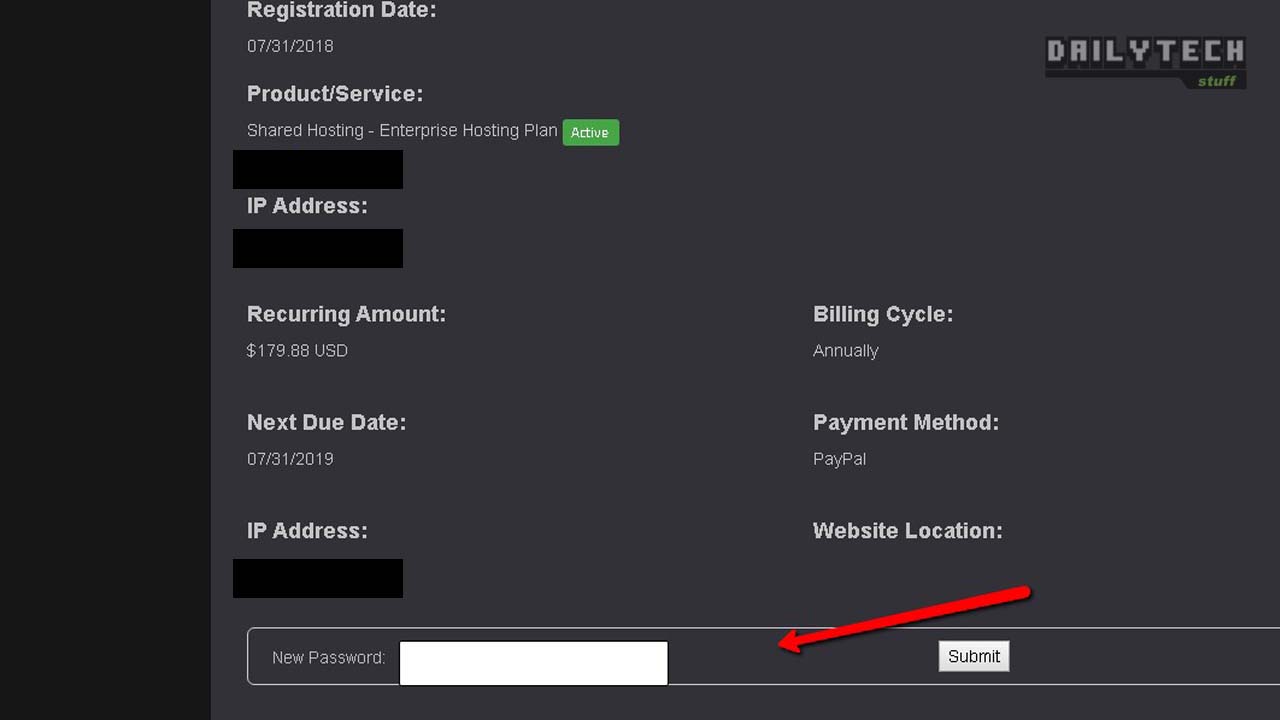 In this section of main domain details, I expected that the button for control panel login will appear here, but it didn’t. That’s why I’ve contacted the support of HostNine and they gave me the cPanel access to my account.
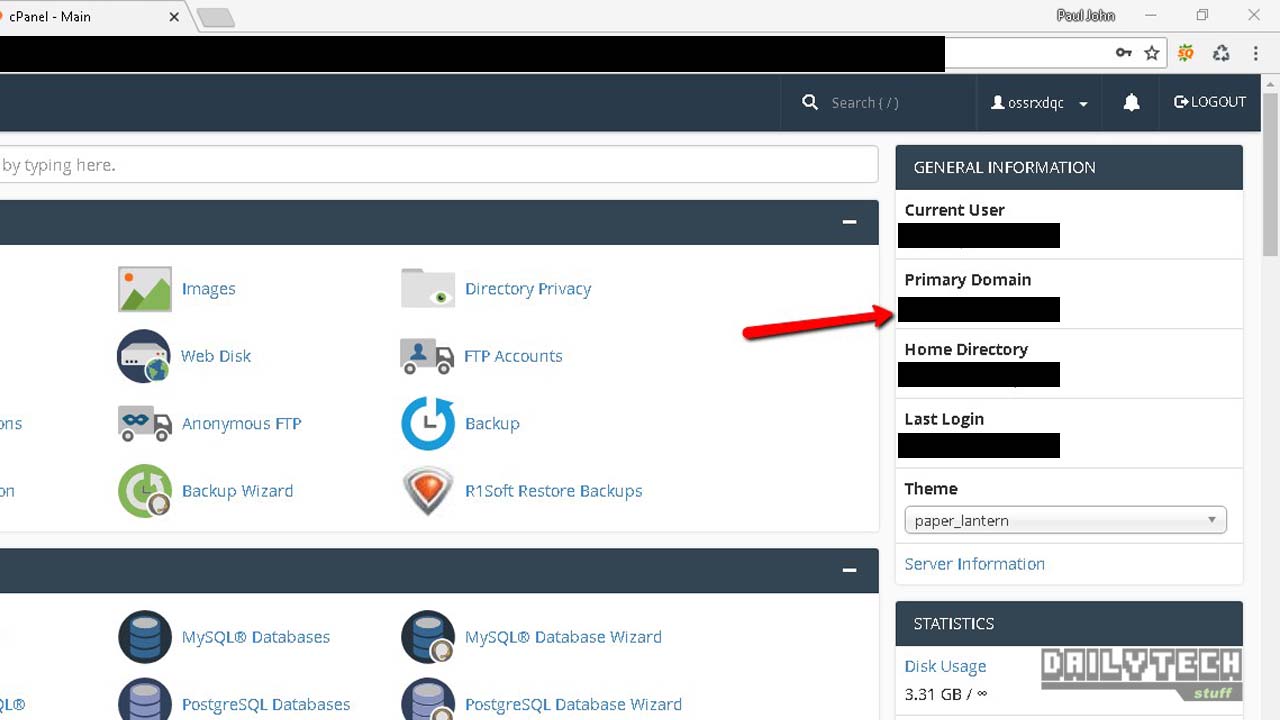 The above screenshot is your main domain cPanel dashboard that contains all the tools needed in building up your site such as the File Manager, phpMyAdmin, MySQL® Databases, Addon Domains, etc.
A. Adding a Domain to your HostNine Account
- Click on “Addon Domains” on the “DOMAINS” Section.
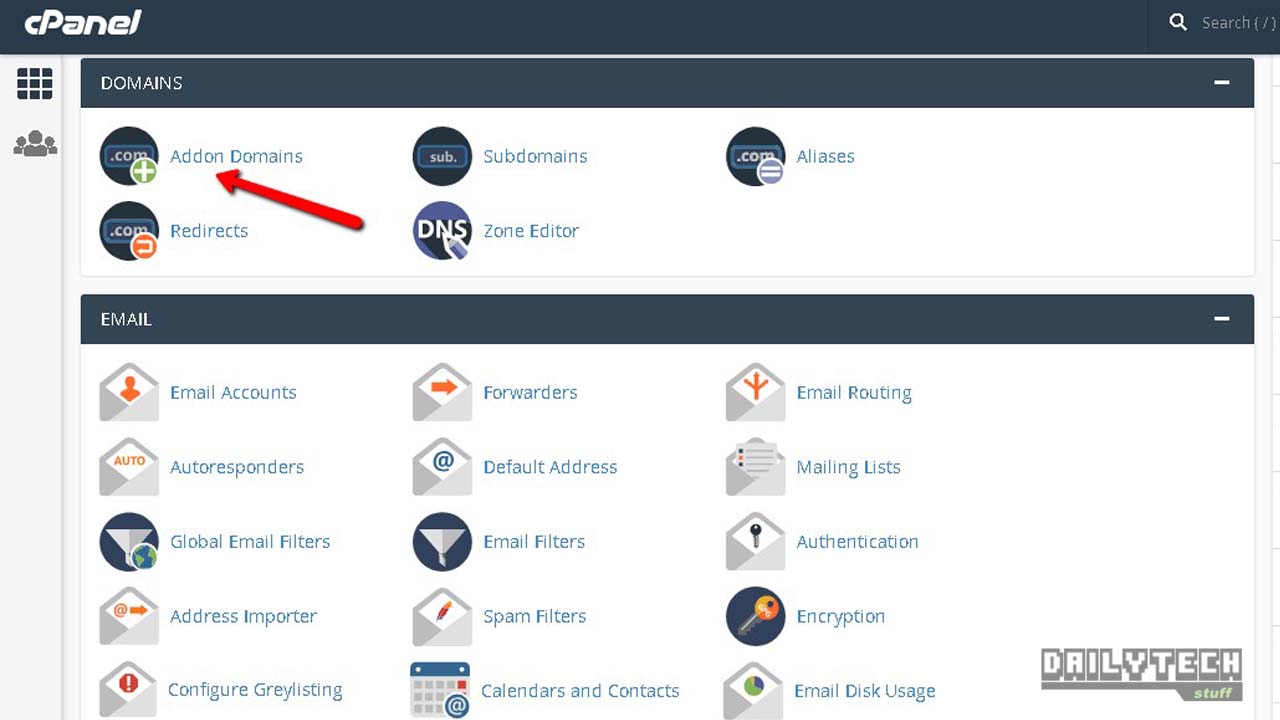
- Add the new domain you want to add by filling up some important credentials.
- Put the domain name that you want to add on the “New Domain Name” field, after that the following fields will be automatically generated except the password fields. The password for your FTP must be easy to remember, it would be better if you will use a universal FTP password for all the domain you will add.
- After filling up all the needed fields, just click the “Add Domain” button to finally add your domain on your HostNine account/ main domain. After that, a new window will load indicating that your domain has been added. Just click the “cPanel” on the top to go back to your cPanel main dashboard and to proceed for the next part which is the “WordPress Installation”.
B. Installing WordPress on a Domain
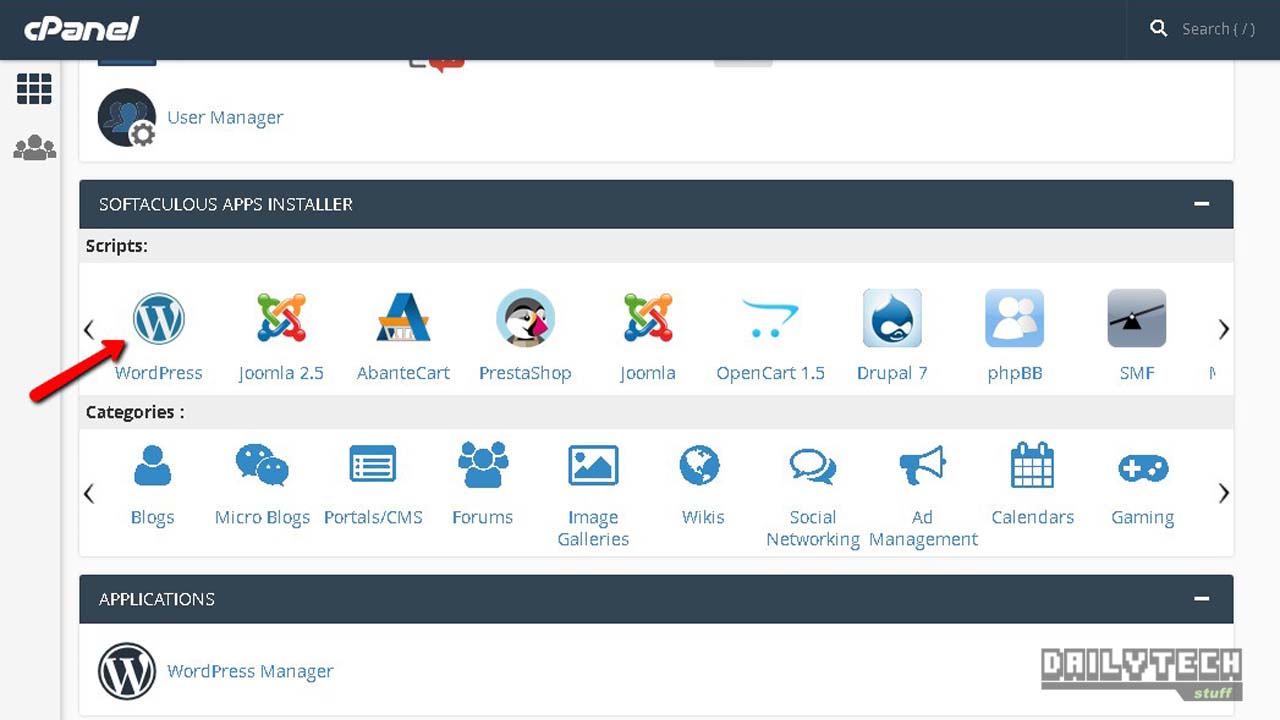
- After getting back to the cPanel main dashboard, look for the “WordPress” icon on the lower part under the “SOFTACULOUS APPS INSTALLER” Section. Click on it to proceed on the WordPress Installation window.
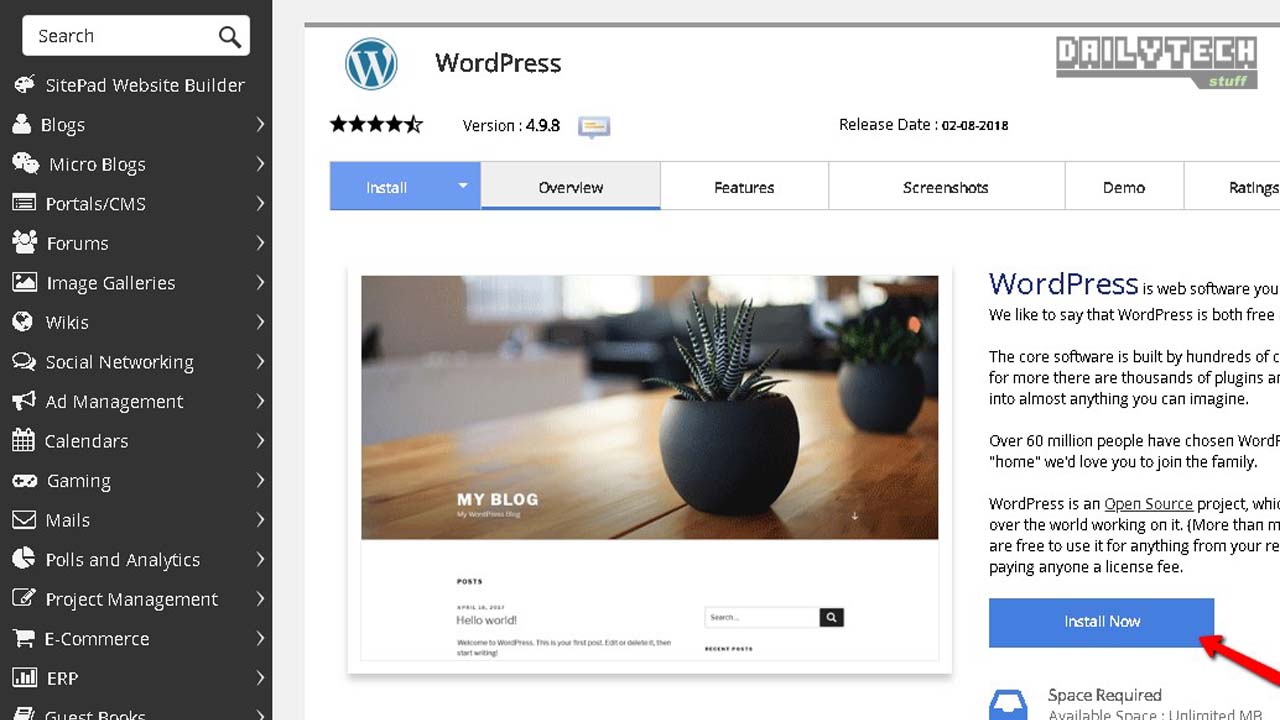
- Click on the “Install Now” button to start the installation of WordPress on your added domain.
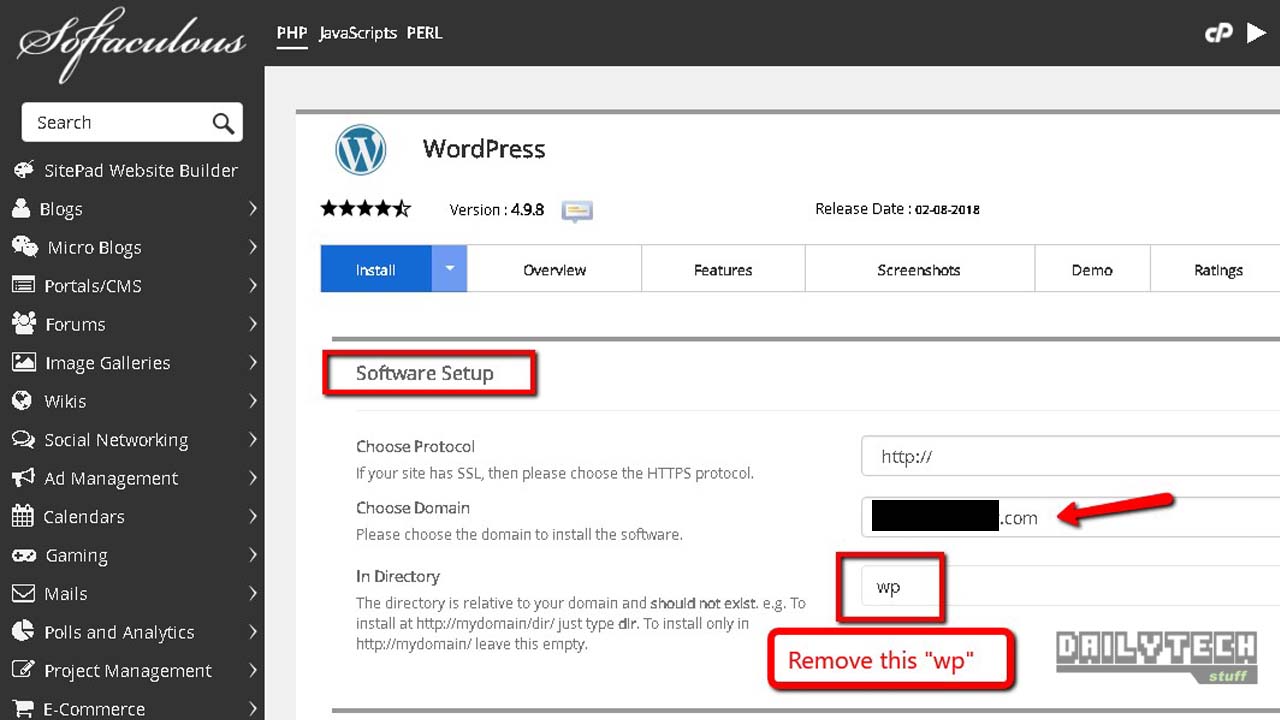
- On the “Software Setup” part; the protocol will be the default “http://”, then choose the domain you want to install WordPress, and leave the “In Directory” field blank.
- On the “Site Settings” part, put the proper site name you want for your site, same in the “Site Description” field (this will be your site tagline), and leave the checkbox below unchecked.
Next is the “Admin Account” part, put the credentials that you want for your WordPress admin dashboard.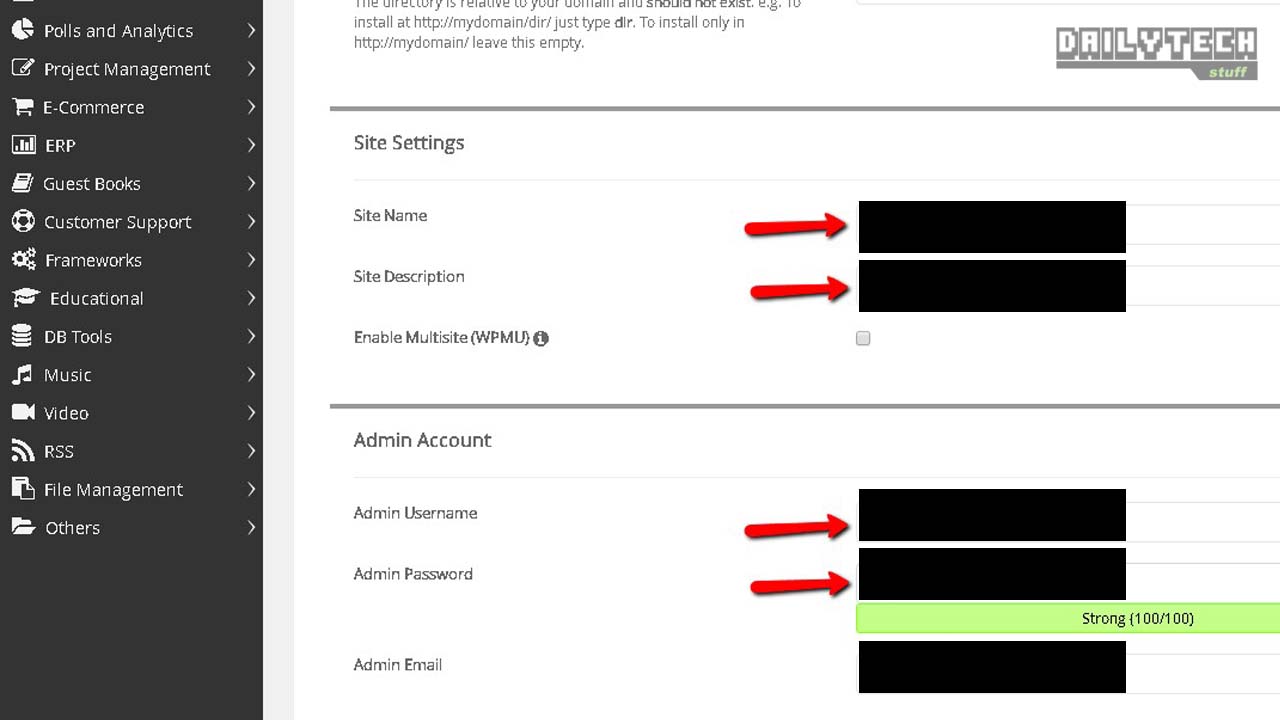
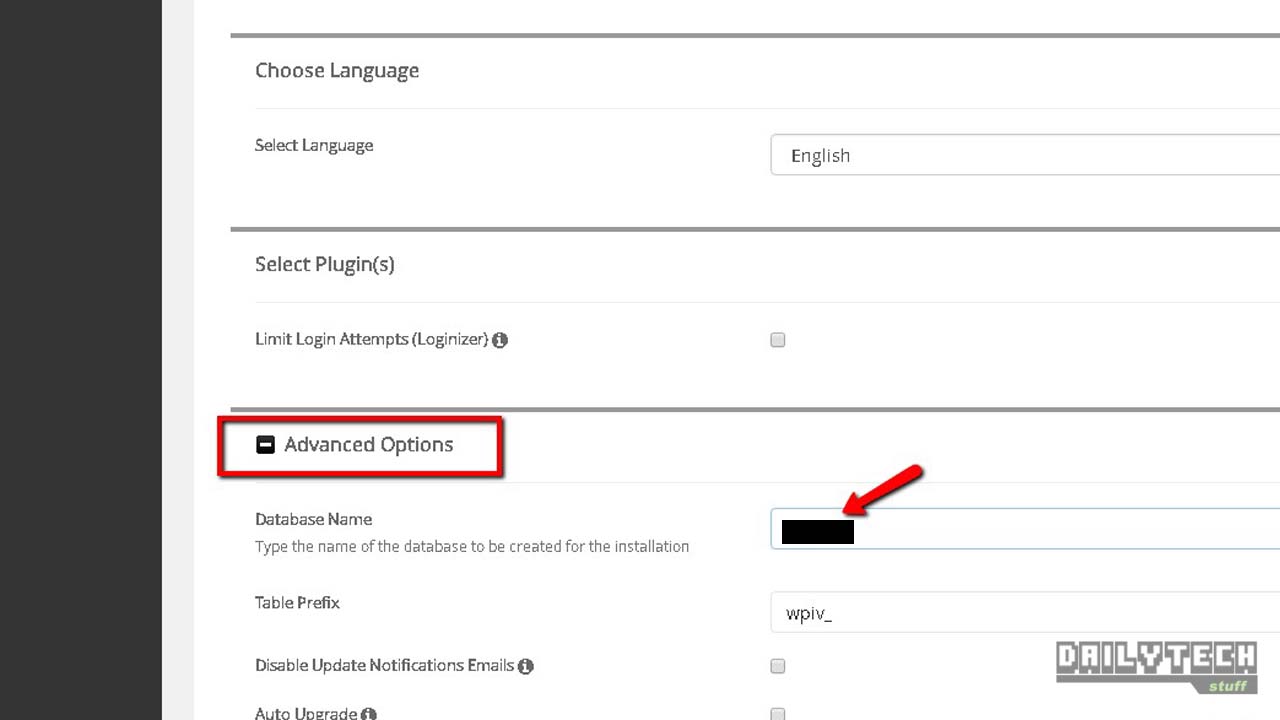
- On the “Choose Language” part, leave it English. Click on the “Advanced Options” part to break down its fields, put a proper database name for your site’s database for fast and easy identification. Then leave the other fields on this part on its default.
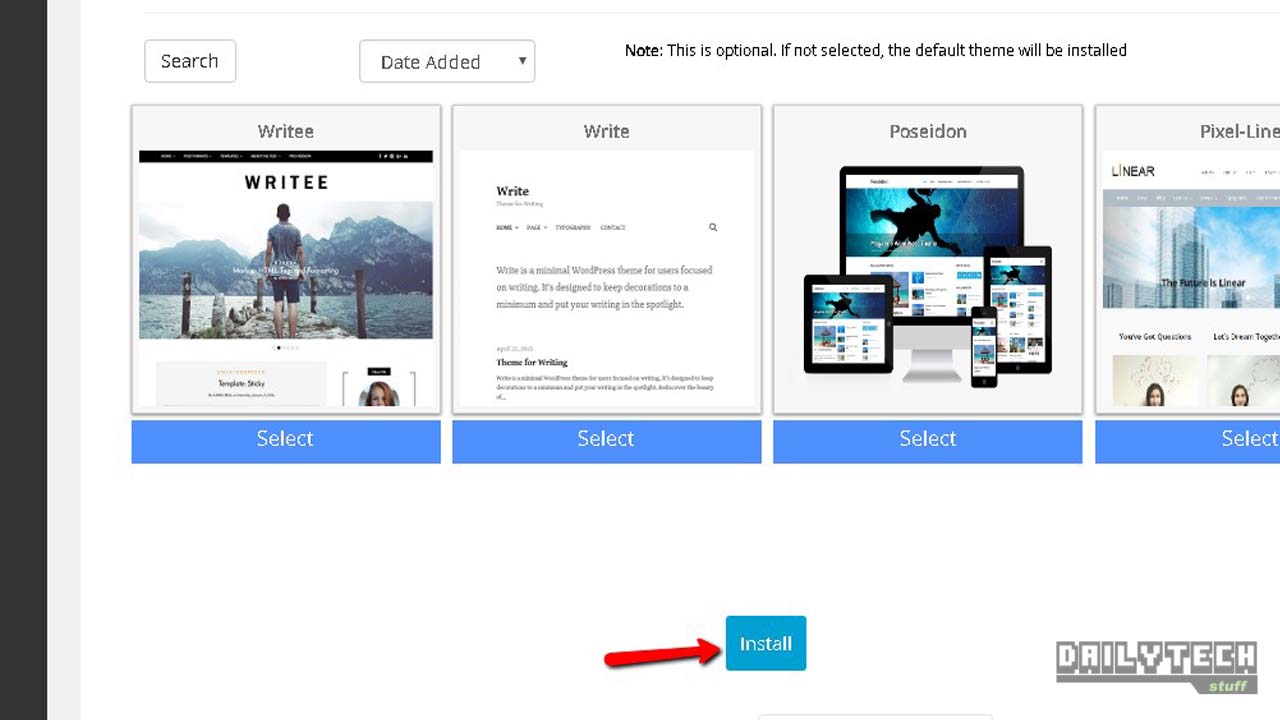
- Lastly, on the lower part just click the “Install” button to finally install WordPress on your domain/ site. After that, a new window will load indicating that you successfully installed WordPress on the domain and you’re done! Below of that message, there will be a text link, if you want to return to WordPress Installation window or the overview of all domains which already have WordPress just simply click on it.
Using H9 is incredibly easy and convenient. In fact, by just following the steps above you can successfully add a domain to HostNine and install WordPress.
Leave a Reply